Exploring ArcMap and ArcCatalog
ArcMap
- Allows you to work with all of your geographic data in maps, regardless of format or location of the data (ie., shapefile, jpg, text file)
- Allows you to quickly assemble a map from predefined layers, or add data from coverages, shapefiles, geodatabases, grids, TINs, images, and tables of coordinates or addresses
- Browse, organize, and document data
- Designed to work with ArcMap
- Drag and drop data files from ArcCatalog onto an existing map in ArcMap
- Accessible through both ArcMap and ArcCatalog
- Contains tools for performing sophisticated geoprocessing operations on your data
Exploring Data in ArcCatalog
1. Open ArcCatalog (Start, All Programs, ArcGIS, ArcCatalog)

2. Catalog tree(TOC) – Branches for each local hard drive. Branches for other ArcGIS connections can be added by clicking the Tools menu, then choose Options, then click any checkboxes next to the branches you want to add to the catalog tree.
3. You can also create new branches (connections) in the tree to make it easier to connect to your data.
4. Next, you will make a connection to the folder that contains the Exercise data
5. This new branch in the catalog tree will remain until you disconnect it.
6. On the Toolbar, click the Connect to Folder button.

7. Browse and connect to the C:/temp/ArcGIS_Exercuise folder.
8. Click to highlight the Exercises folder and click OK.
9. The new connection shows up as a branch in the Catalog tree..

10. You can now explore the data in the folder you have added.
11. Click to highlight the C:/temp/ArcGIS_Exercises folder to view its contents on the right-hand side of the ArcCatalog window.
12. Click the plus sign (or double-click) to expand the connection in the Catalog tree.
13. This branch of the tree contains a folder called ‘data’ and several map documents (with a .mxd extension).
14. Click the plus sign to expand the data folder to view its contents in the tree. Highlight the data folder to view its contents in the right-hand side display window (in the “Contents” tab).
15. ArcCatalog recognizes many different types of files. In the data folder, we have more folders (buildings, michigan), a personal geodatabase folder (Umich.mdb), tables (campusalcohol.dbf), shapefiles (cities.shp), a layer file (Roads.lyr), and more.
16. Each of the map documents (ie., ex 02 .mxd) in the Exercises folder are general purpose maps that we will be using in the upcoming exercises, which reference the data files in the data folder.
17. Having this connection set in ArcCatalog will make it easy for us to navigate the data and open map documents .
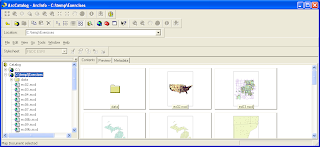
18. Viewing thumbnail sketches – useful for selecting a particular map or data file from many different ones available
19. Click to Highlight the C:/temp/ArcGIS_ Exercises connection in the Catalog tree.
20. Click the Thumbnails button on the Standard toolbar.

21. Look at the thumbnail sketches for the various map documents.
22. Let’s open the ex02.mxd map document to view it in ArcMap.
23. To do this, double-click ex02.mxd in the Catalog tree. This starts ArcMap
and opens the map document.

The ex02.mxd map document displays data from the data folder
- The streetpaths layer is a line feature class contained within the Umich.mdb personal geodatabase, which represents streets on campus
- The umbuildings layer is a polygon feature class also within the Umich.mdb folder, which represents buildings on campus
- The um layer is a polygon feature class also within the Umich.mdb folder, which represents UM property
- The Roads layer (top layer in the ArcMap table of contents), which is currently turned off, is neither a feature class nor a shapefile. It is a layer file (.lyr), which references the streetpaths feature class in the Umich.mdb folder. A .lyr is a set of rules for displaying and working with datasets including symbol assignments, classifications, labeling rules, etc. In this case, the Roads.lyr file symbolizes the streetpaths feature class with different color/size lines for the different street/road types.
- To view the Roads layer, turn it on by checking the box next to Roads in the table of contents.

Connecting to GIS Servers:
1. The Geography Network portal
-The main theme of the Geography Network is the sharing of geographic information
-As more people begin to see the value of using GIS to structure their organization and solve their problems, the need for easy access to geographic information continues to rise
-The Geography Network is a global network of geographic information users and providers. It delivers geographic content over the internet to user browsers and desktops. Content may be provided in the form of raw data, maps, or more advanced services, for example, lifestyle mapping, flood risk mapping, address geocoding, and network routing
-The Geography Network is also a global community of government and commercial users, data publishers, and service providers, who contribute to making geographic content more widely available.
25. Open ArcCatalog (if necessary)
26. Scroll down and expand the ‘GIS Servers’ folder
27. Double-click ‘Add ArcIMS Server’
28. In the ‘URL Server’ box, type ‘www.geographynetwork.com’ and click ‘ok’
Expand the new ‘www.geographynetwork.com’ connection

29. View the available services (preview, content, metadata)
30. Start ArcMap (click on the Launch ArcMap button)
31. Click and drag a service from the Catalog tree into the ArcMap display window


No comments:
Post a Comment